


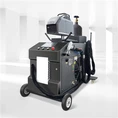
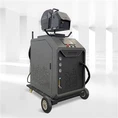

Here's how to connect a laser welding machine to a nitrogen generator during use, ensuring a stable and clean nitrogen supply to protect the welding area from oxidation:
1. Pre-connection Preparation
Check parameter compatibility:
Verify the nitrogen generator's purity (≥99.99% for general laser welding; 99.999% for high-precision tasks), outlet pressure (typically 0.4-0.8MPa, refer to the laser welder's manual for specifics), and flow rate (5-30L/min, adjusted based on the welding torch model and power).
Confirm the laser welder's nitrogen inlet specifications (e.g., thread type: M8, M10, or quick-connect fittings) and prepare matching connectors.
Prepare materials:
High-pressure nitrogen hoses (PU or stainless steel bellows, pressure resistance ≥1MPa, inner diameter 6-10mm; avoid aging rubber hoses).
Fittings (quick-connect adapters, thread converters, pressure gauges, regulators, filters).
Sealant tape (PTFE tape) or gaskets (for thread sealing to prevent leaks).
2. Connection Steps
1. Connect the nitrogen generator to the main pipeline:
Run a hose from the nitrogen generator's N₂ OUT" port. First connect a filter (to remove moisture and impurities), then a pressure gauge and regulator (to monitor and adjust output pressure).
2. Connect to the laser welder's inlet:
Locate the laser welder's "N₂ IN" port(usually near the welding torch cable or on the main unit).
Connect the regulator's outlet to the welder's inlet using a hose. Secure threaded connections with PTFE tape (avoid over-wrapping to prevent blockages).
3. Branch connections (if multiple devices are used):
- Add a **manifold valve** after the nitrogen generator's outlet for simultaneous supply to multiple torches or auxiliary equipment, with independent regulators for each branch.
3. Post-connection Debugging & Checks
Leak testing:
Turn on the nitrogen generator, adjust pressure to the welder's required range (e.g., 0.5MPa), close the welder's inlet valve, and check if the pressure gauge remains stable. Bubbles from soapy water applied to joints indicate leaks-retighten or replace fittings.
Flow adjustment:
Power on the laser welder, set the nitrogen flow in the parameters (e.g., 10-20L/min for stainless steel). A bright, oxide-free weld indicates proper protection; blackening or porosity may mean insufficient flow/purity.
Safety checks:
Ensure hoses are unkinked, away from high-temperature areas (e.g., the welding head), and undamaged. Ground the nitrogen generator to prevent static interference; purge residual air from pipes before first use after long shutdowns.
4. Notes
Maintain the nitrogen generator regularly (e.g., replace filter cartridges) to ensure air purity and prevent nozzle blockages.
If the welder has a built-in air tank, purge residual air before introducing nitrogen to avoid gas mixing.
Refer to the equipment manuals for brand-specific connection diagrams, as inlet designs may vary.
Proper connection ensures stable nitrogen supply and optimal welding quality.
--------Victor Feng
Rayther Laser