


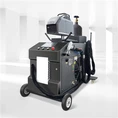
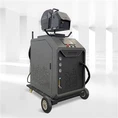
1. Unpacking and Inspection
Unbox Components: Carefully remove all parts from the packaging and ensure nothing is missing. Refer to the manual to cross-check components.
Inspect for Shipping Damage: Check all components for visible damage. If any parts are damaged or missing, immediately contact your supplier.
2. Setting Up the Machine Base
Position the Machine: Place the cutting machine on a sturdy, level surface. Make sure the machine is stable to avoid vibrations during operation. The workspace should be clean and free from clutter.
Check for Stability: Ensure the machine's base is securely mounted. Some models may require bolting down to the floor or using vibration-absorbing pads.
3. Connecting the Components
Laser Source Connection: Connect the laser source to the main control unit. Ensure the connections are firm and properly insulated to avoid electrical hazards.
Cooling System: Install the cooling system (such as a chiller) and connect it to the laser source. Ensure proper water flow and check for leaks. The cooling system is essential to prevent overheating.
Gas Supply Connection: Connect the gas supply line to the machine. Make sure the pressure regulator is set to the appropriate levels for your cutting material. Most laser cutting machines use nitrogen, oxygen, or compressed air.
Fiber Optic Cable (For Fiber Laser Models): If you have a fiber laser cutting machine, connect the fiber optic cable between the laser source and the cutting head. Be sure to handle the fiber optic cable with care to prevent damage.
4. Installing the Software
Install Control Software: Download and install the software provided by the manufacturer on your computer. Follow the step-by-step instructions during installation. The software controls the cutting parameters and machine settings.
Set Up Drivers: Ensure that the necessary drivers are installed for proper communication between your computer and the laser cutting machine.
Software Calibration: Calibrate the machine through the software interface to align the laser and cutting head. This ensures the laser follows the correct path for accurate cuts.
5. Testing and Calibration
Initial Test: Perform an initial test with a scrap piece of material to ensure the machine is functioning correctly. This test will help you check for issues with laser alignment, cutting power, and speed settings.
Adjust Parameters: Use the software to adjust the cutting parameters, including speed, power, and focus, based on the test results. Fine-tuning these settings is key to achieving high-quality cuts.
Safety Check: Ensure that all safety mechanisms are in place, including protective covers, emergency stop buttons, and safety interlocks. Make sure operators are trained in safe operation.
6. Final Inspection and Setup
Secure Connections: Check all connections one more time to ensure they are secure and properly insulated. This includes the power supply, cooling system, gas lines, and fiber optic cables.
Machine Alignment: Verify that the cutting head is properly aligned. If necessary, adjust the gantry and rails to ensure smooth movement. Check that the focal length is set correctly for the materials you are cutting.
Safety Gear: Ensure all operators wear appropriate personal protective equipment (PPE), such as laser safety glasses and gloves, to protect themselves from hazards during operation.
Conclusion
Proper assembly of your laser cutting machine is crucial for safe and efficient operation. By following these steps and regularly maintaining your machine, you can ensure it performs at its best. Always refer to the manufacturer's manual for specific guidelines and safety instructions. Regular calibration and cleaning will help maintain cutting precision and prolong the lifespan of your machine.
-------------Amelia