


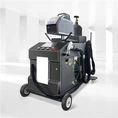
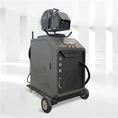
Fiber laser cutting machines have become the preferred choice for many industries due to their precision, efficiency, and versatility. However, as high-precision equipment, they require regular maintenance to ensure optimal performance, minimize downtime, and extend their service life. For operators and maintenance personnel, understanding the correct maintenance procedures is crucial. Below is a detailed maintenance schedule and key
precautions to help you keep your fiber laser cutting machine in top condition.
Safety Precautions Before Maintenance
Power Off the Machine – Always shut down the machine using the main power switch before performing any maintenance. Ensure all components are completely powered off to prevent electrical hazards.
Follow Safety Protocols – Wear appropriate protective gear, such as gloves and safety glasses, when handling machine components.
Cleanliness is Critical – Dust, metal shavings, and debris can damage sensitive parts. Use industrial vacuum cleaners and lint-free cloths for cleaning.
Avoid Harsh Handling – Be gentle when cleaning optical components (e.g., lenses, mirrors) to prevent scratches or misalignment.
Consult Manuals & Professionals – If unsure about any procedure, refer to the manufacturer's guidelines or contact after-sales support.
Maintenance Schedule for Fiber Laser Cutting Machines
Daily Maintenance Tasks
Clean the Laser Cutting Head & Nozzle
Use high-purity alcohol and a lint-free cotton swab to clean the lens.
Inspect the nozzle for damage or misalignment; replace if necessary.
Ensure the cutting head is free of debris to maintain beam quality.
Check Machine Homing
Verify that the machine returns to its origin position correctly.
Inspect Laser & Nozzle Alignment
Misalignment can reduce cutting precision; recalibrate if needed.
Test Control Panel & Emergency Stop
Ensure all buttons, including the emergency stop, function properly.
Monitor Air Pressure & Gas Supply
Check for leaks in the air supply system.
Verify that cutting gas pressure is within the recommended range.
Examine Water Cooling System
Look for leaks in water lines.
Ensure coolant levels are adequate.
Listen for Abnormal Noises
Unusual sounds may indicate mechanical wear or misalignment.
Weekly Maintenance Tasks
Lubricate X, Y, and Z-Axis Rails & Screws
Remove debris before applying lubricant to ensure smooth movement.
Inspect the Exchange Worktable (if applicable)
Check chain tension and movement.
Clean slag and debris from the worktable.
Examine Proximity Sensors & Bumpers
Ensure sensors are functioning correctly to avoid positioning errors.
Drain Water from Filters
Prevent moisture buildup in the air supply system.
Manually Lubricate Z-Axis Screws
Apply grease twice to maintain smooth operation.
Monthly Maintenance Tasks
Inspect Electrical Cabinet Components
Check for loose connections or overheating.
Use a vacuum (not compressed air) to remove dust from the cabinet.
Change Water Coolant (if required)
Use deionized or distilled water to prevent mineral buildup.
Ensure the chiller is powered off during maintenance.
Verify Motor Driver Connections
Tighten any loose connectors to prevent electrical issues.
Test Air Compressor Performance
Ensure consistent air pressure and check for leaks.
Clean the Control Computer
Remove dust from the CPU, motion control card, and memory modules.
Quarterly (Every 3 Months) Maintenance
Check Cutting Head Mounting Stability
Loose connections can affect cutting accuracy.
Adjust Chiller Temperature (18-28°C)
Maintain optimal cooling for the laser source.
Inspect Air Filters
Replace if clogged to ensure clean air supply.
Examine Optical Components
Check the focusing and collimating lenses for wear or contamination.
Biannual (Every 6 Months) Maintenance
Deep Clean Electrical Cabinet
Remove accumulated dust to prevent overheating.
Inspect Dust Covers & Protective Cloths
Replace damaged covers to prevent debris ingress.
Check Air Compressor & Filters
Replace air filter elements if necessary.
Assess Cutting Nozzle & Lens Condition
Replace worn-out components to maintain cutting quality.
Annual Maintenance Tasks
Replace Water Lines & Coolant
Prevent algae or mineral buildup in the cooling system.
Inspect Electrical Relays & Cables
Replace any worn-out relays or loose connections.
Evaluate Cutting Bed & Tooth Plates
Replace damaged plates to ensure consistent material support.
Laser Source Maintenance
Clean internal components or schedule professional servicing.
Biennial (Every 2 Years) & Long-Term Maintenance
Replace Air & Water Filters – Prevent contamination in pneumatic and cooling systems.
Check Ball Screws & Guide Rails – Replace if wear affects precision.
Inspect Safety Relays & Sensors – Ensure emergency systems remain functional.
Evaluate High-Pressure Air Lines – Replace aging tubes to prevent leaks.
Every 3-4 Years: Full Machine Overhaul
Replace worn chains, gears, and transmission components.
Check the computer system for potential upgrades.
Conduct a comprehensive inspection of all mechanical and electrical systems.
Winter Maintenance Considerations
❄ Use Antifreeze in Water Coolers – Prevent freezing damage to the laser and cooling system.
❄ Monitor Power Supply – Ensure uninterrupted operation to avoid coolant freezing during outages.
❄ Switch Back to Deionized Water in Spring – Flush the system thoroughly before refilling.
Conclusion
Proper maintenance is essential for maximizing the lifespan and efficiency of your fiber laser cutting machine. By following this structured maintenance schedule, you can minimize unexpected breakdowns, reduce repair costs, and ensure consistent cutting quality.
For further assistance, always consult your machine's manual or contact professional after-sales support. A well-maintained machine is a productive and long-lasting investment!
Need Help? Contact our expert after-sales team for 24/7 technical support and maintenance guidance.
--Allen Wang